Remote access of Ubuntu from Windows using TightVNC Viewer.
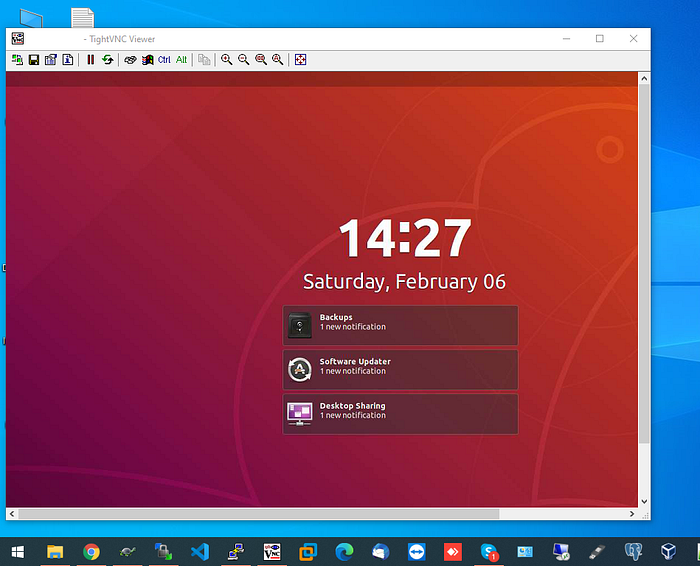
TightVNC Viewer is the simplest application use to take the remote access of any Ubuntu and CentOS Distribution, only just need to enable VNC Protocol in Linux Distribution System.
Enable VNC from Ubuntu 20.04, 18.04, and 16.04 systems and get access from windows using TightVNC viewer software.
Prerequisites:
The Windows system must be in a LAN network. If it is not then get connected using VPN.
Settings in Ubuntu Systems:
The settings are much similar in all versions of the Ubuntu system. The steps to enable follow below:
STEP 1: Install dconf-editor in ubuntu systems from ubuntu software manager or from the terminal.
Method 1: Install dconf-editor from the terminal.
Run below following commands to install dconf-editor.
sudo apt-get update -ysudo apt-get install -y dconf-editor
Method 2: Install dconf-editor from Ubuntu software manager.
Search dconf-editor in ubuntu software manager and install and launch it.

STEP 2: Launch dconf-editor and follow the below settings (For Ubuntu 20.04 and 18.04).
Setting 1:
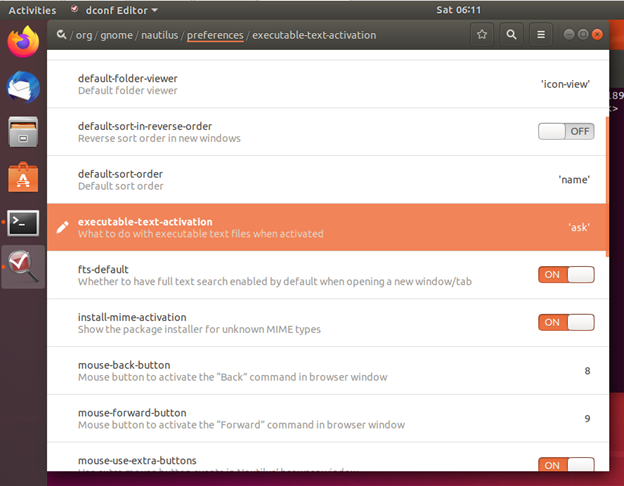
In dconf-editor redirect to /org/gnome/nautilus/preferences/executable-text-activation menu
In this menu, there is a Name Value setting so edit values as below
default-sort-order = ‘name’executable-text-activation = ‘ask’
Refer to Figure 1 for reference
Setting 2:
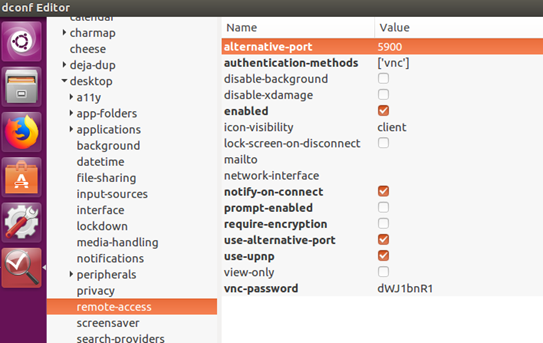
In dconf-editor redirect to /org/gnome/desktop/remote-access menu
Set values as follows:
notify-on-connect = ONprompt-enabled = OFFrequire-encryption = OFFuser-alternative-port = ONuse-upnp = ON
Refer to Figure 2 for reference.

Screenshot of the setting in Ubuntu 16.04:
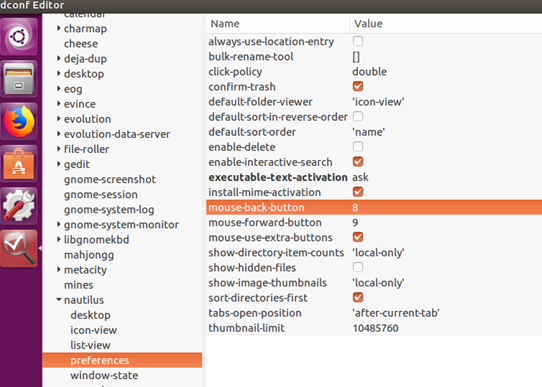
The key and value set are similar in Ubuntu 16.04 only the difference is in its Graphical View.
Refer below figure a and b for reference.
Setting 1: In /org/gnome/nautilus/preferences/executable-text-activation menu
Setting 2: In /org/gnome/desktop/remote-access menu
STEP 3: Turn ON Desktop Sharing from the ubuntu system
In Ubuntu 18.04 systems go to Settings > Sharing
Refer to figure c

Then click on Screen Sharing so a new window will open as below in figure d
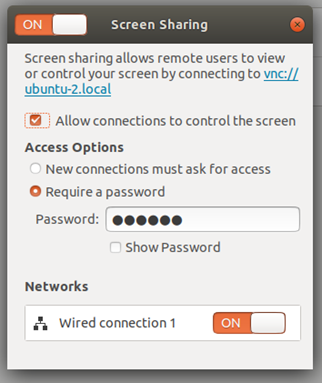
In this window tick on Allow connections to control the screen check box then select Required a password in Access Option and set a required password for the connection. Set same as figure d.
In Ubuntu 16.04 systems run Desktop Sharing Application then the window will open as below figure e
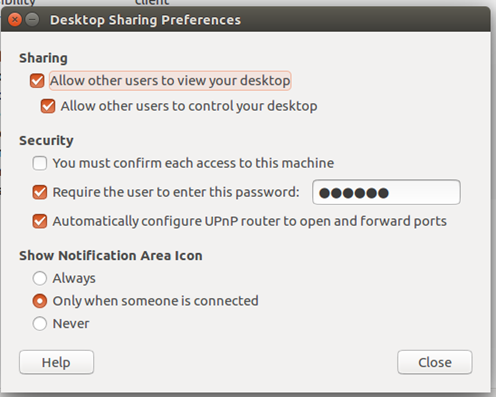
In this window In Sharing option tick on Allow other users to view your desktop check box and Allow other users to control your desktop checkbox.
In Security tick on Require the user to enter this password and set password and tick on Automatically configure UPnP router to open and forward ports.
In Show Notification Area Icon select Only when someone is connected.
Set everything same as figure e.
STEP 4: Connect Ubuntu system remotely via TightVNC viewer from Windows system.
Download the latest version of TightVNC from the below link in windows according to 32bit or 64bit OS and install.
https://www.tightvnc.com/download.php
Start TightVNC viewer then the window will open shown in figure 6 below.
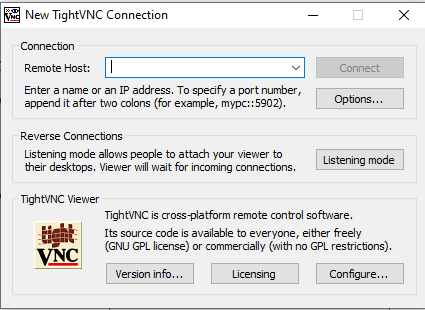
In this window enter the IP of the remote host and click on connect then it will pop-up a new window for a password.

Then enter the same password which was set Desktop Sharing setting in the ubuntu system then click on OK so ubuntu system will be accessible from the windows system without using RDP.
Troubleshooting:
In Ubuntu systems, the default port number of VNC is 5900 which sometimes not allowed from the firewall. For that, we must have to allow this port by using the below command and then try to reconnect.
sudo ufw allow 5900